Paris/PROTOCOLS
From 2007.igem.org
For newcomers in wetlab: see also the course by D. Endy Laboratory Fundamentals of Biological Engineering.
Getting started
This topic is adressed to all our informatics-physics-I'm-afraid-of-the-bench fellows. So, if you finally found the courage to dare the pipettes, PCRs and nicely smelling bacteria, welcome!
- What a pipette is?
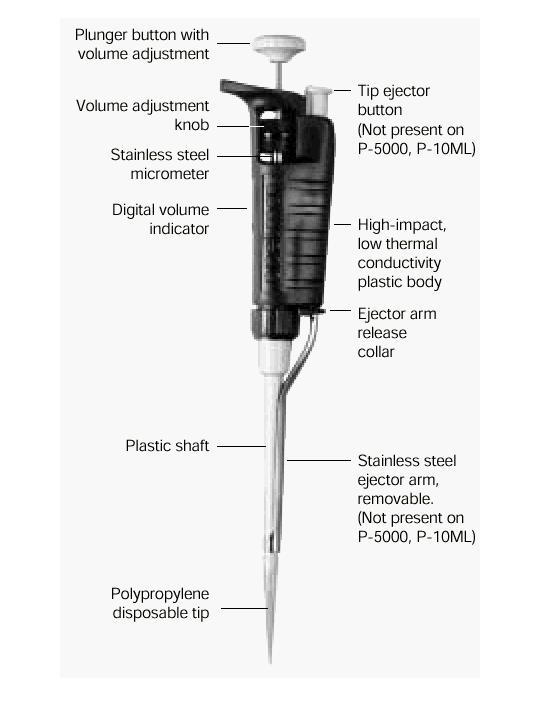
Pipettes dispense various volumes. The plunger button indicates the maximum volume (microliters) that the pipette is designed to handle. For example, P-20 will handle up to 20 microliters.
The digital volume indicator is read from top to bottom. For P-2, P-10, P-20, P-100, and P-200, black digits indicate microliters and red digits tenths and hundredths of microliters. For P-1000, red digits indicate milliliters and black digits microliters.
What to do when you have it in you hand?
-Hold the pipette in one hand (it doesn't bite...). With the other hand, turn the volume adjustment knob counterclockwise so the volume indicator is 1/3 revolution above the desired setting, then slowly turn clockwise until the indicator shows the desired volume.
-Attach a new disposable tip to the pipette shaft.
-Press the plunger to the FIRST stop. This part of the stroke is the volume displayed by the indicator.
-Holding the pipette vertically, immerse the tip a few millimeters into the sample.
-Allow the pushbutton to return slowly to the UP position. Avoid to blurt out the plunger button abruptly : there are bulls appearing and your volume is false...
-Ensure that the full volume of sample was properly drawn into the tip.
-Withdraw the tip from the sample.
-To dispense the liquid, gently touch the tip to the side of the receiving vessel, immersing the tip into liquid within the vessel. Press the plunger to the SECOND stop.
-With the plunger fully pressed, withdraw the tip carefully, wiping residual drops against the vessel wall.
-Allow plunger to return to the UP position.
-Discard the tip by depressing the tip ejector button.
Note down that different tips exist : ensure that you have the right one (labels will indicate you the size, etc.). It's better to use filter tips.
To train, you can simply pipette water : it's important to know how much 1 µl is...
To be continued...
- Growing bacteria in liquid medium
-Light the Bunsen burner. It permits you to keep a 10 cm perimeter sterile et thus not to contaminate your future colonies.
-Get a 50mL Falcon tube and put into 5 mL of LB medium. Add supplementary stuff if needed (antibiotics, metabolites, etc.).
-Pick up a sterile toothpick. Use it to gather a single colony of cells (you know, a white point on your Petri dish...).
-Place the toothpick with the colony into the solution.
-Incubate overnight at 37°C with shaking (at about 200 rpm).
Next morning, after a cup of coffee and a croissant, you can check up  .
.
<<home
Strains
Here you can find the list of strains we have.
E. Coli MG1655
WT
E. Coli w121
We got the w121 strain from a lab in Pasteur Institute. This strain is [DapA-; Erythromycin R], but also has a couple of other mutations we are not interested in.
E. Coli Ftsz -TS84
Three clones are available : 121.1, 121.2, 121.3. More details soon
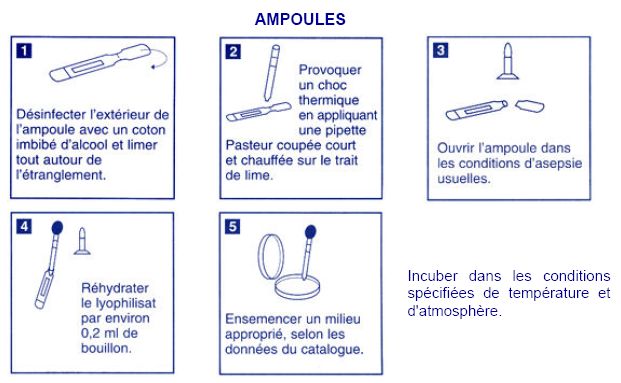
Acinetobacter: dehydrated strain
Transduction with P1 bacteriophage
Preparation of the P1 stock on the w121 strain.
- Filtration of the CaCl2 and MgSO4 stocks
- Launch a culture:
- - 15ml LB
- - 225µl Cacl2
- - 450µl MgSO4
- - 90µl DAP
- - 150µl W121 from an ON culture
- Let grow until OD=0.2 (~1h)
- Add 100µl P1 (stock 1010/ml)
- Incubate 2h
- Add 200µl Chloroform
- Vortex, centrifuge (15min @ 3000rpm)
- Recover the supernatant + add 200µl Chloroform = Stock keep at 4°C
Transduction to MG1655 using the P1 stock made on w121.
- First step for transduction : adsorption
- Control (1mL LB MgSO4 30mM; CaCl2 15mM)
- 5µL Phage + 900µL LB (MgSO4 30mM; CaCl2 15mM) + 100µL MG1655 Culture overnight
- 50µL Phage + 900µL LB (MgSO4 30mM; CaCl2 15mM) + 100µL MG1655 Culture overnight
- 500µL Phage + 500µL LB (MgSO4 30mM; CaCl2 15mM) + 100µL MG1655 Culture overnight
- 20 min at 37°C
- Centrifuge at 12000rpm during 5 min
- Resuspend bacteria in 1,5mL LB (NaCitrate 20mM; DAP 300µM)
- Incubation 1h10 at 37°C with agitation
- Centrifuge 5 min at 5000rpm
- Plate bacteria on LB-agar (NaCitrate 20mM; DAP 300µM)
Titration of bacteriophages
- Take your stock of bacteriophage
- make several dilution of your stock, for example :
- 10µL of stock in 990µL MgSO4 0.1M -> d2
- 10µL of former solution in 990µL MgSO4 0.1M ->d4
- 10µL of former solution in 990µL MgSO4 0.1M ->d6
- 10µL of former solution in 990µL MgSO4 0.1M ->d8
- In a petri dish containing LB, spread a solution of 100µL of E. Coli MG1655 in stationnary phase + warm top agar 900µL (TA,7)
- Spread this mix over a petri dish
- add droplets (7µL) of your phages dilution on the petri dish, mark the places where you put these droplets
- Incubate ON at 37°C
- check for lyse plaque
Preparation of DAP solution from the powder (50mM)
Step of Friday, July 6
- M(DAP)=190.2g/mol
- I put 0.285g of DAP in 30ml water
- Aliquoted by 15ml
- Stored in the freezer at -20°C
- the stock is 166x
Preparing growth media
Making 10 petri dish (LB+tet+citrate+DAP)
- take 250ml of LB
- warm it up in the microwave for ~ 6min
- wait until you can handle the bottle for 2sec
- add 5ml of citrate 1M
- add 1.5ml of DAP
- add 250µL of tetracycline (stored in freezer at 1000x)
- spread the medium in about 10 petri dish
Making 10 petri dish (LB+erythromycin+citrate+DAP)
- take 250ml of LB
- warm it up in the microwave for ~ 6min
- wait until you can handle the bottle for 2sec
- add 5ml of citrate 1M
- add 1.5ml of DAP
- add 1.9mL of erythromycin (stored in the freezer at 133x)
- spread the medium in about 10 petri dish
Low Nitrogen Minimum Medium
The LNMM medium contains:
- 2g KH2PO4
- 1.18g succinic acid
- 0.1g NH4SO4
- 980mL H2O
- water adjudted to pH 7.0 with KOH
After autoclaving, 20mL of sterile MgSO4 2% (w/v) are added.
Solid media were prepared by the addition of 1.5% (w/v) agar-agar.
Culture were incubated at 30°C aerobic.
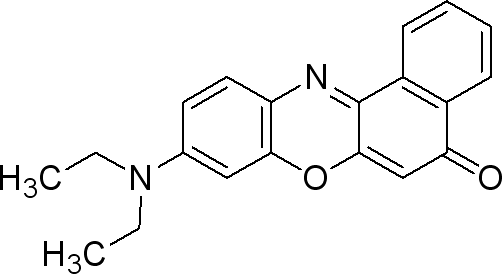
Nile Red
Sigma (N3013)
The dye is used at 0.5µg / mL medium. (liquid or solid).
- make a solution of 0.25mg Nile red / mL DMSO
- take 0.002 mL/mL medium from the previous solution (final concentration 0.5µg Nile Red/ mL medium).
This dye is excited by light around 450-500 nm and the emission light is > 528 nm (red). It can be exited around 515-560 and emission light is >590.
Solid M9 Minimum Medium
- Prepare M9 (5x):
- 64 g Na2HPO4.7H2O - 15 g KH2PO4 - 2.5 g NaCl - 5 g NH4Cl - dissolved in deionized water to a final volume of 1 L
- Autoclaving
- Component adding (final concentration):
- 2mM MgSO4
- 0.1mM CaCl2
- 0.4% carbon source (glycerol, glucose, lactose)
- B1 vitamine (1mM final)
- agarose (15% final)
- in sterile H2O
Chemical transformation
This protocol is based on the Invitrogen protocol (Subcloning Efficiency Competent cells). It uses DH5alpha E.coli strain chimically competent.
- Put 50µL bacteria into 1.5mL microcentrifuge tube and incubate within ice.
- Add 1-5µL (1-10ng) of DNA to the cells and mix gently (do not mix by pipetting up and down!)
- Incubate on ice for 30 minutes
- Heat shock cells for 20 seconds in a 42°C water bath without shaking
- Place tubes on ice for 2 minutes
- Add 950µL of pre-warmed medium of choice to each tube
- Incubate tubes at 37°C for one hour at 225rpm
- Spread 20 to 200µL from each transformation on pre-warmed selective plate.
- Store the remaining transformation reaction at 4°C
- Incubate plates overnight at 37°C
Glycerol Stock
- add 1mL of 40% glycerol into cryogenic tube
- add 1mL of overnight bacterial culture
- vortex gently
- stock at -80°C
Recombineering/Lambda red-mediated gene replacement
See OpenWetWare [[1]]
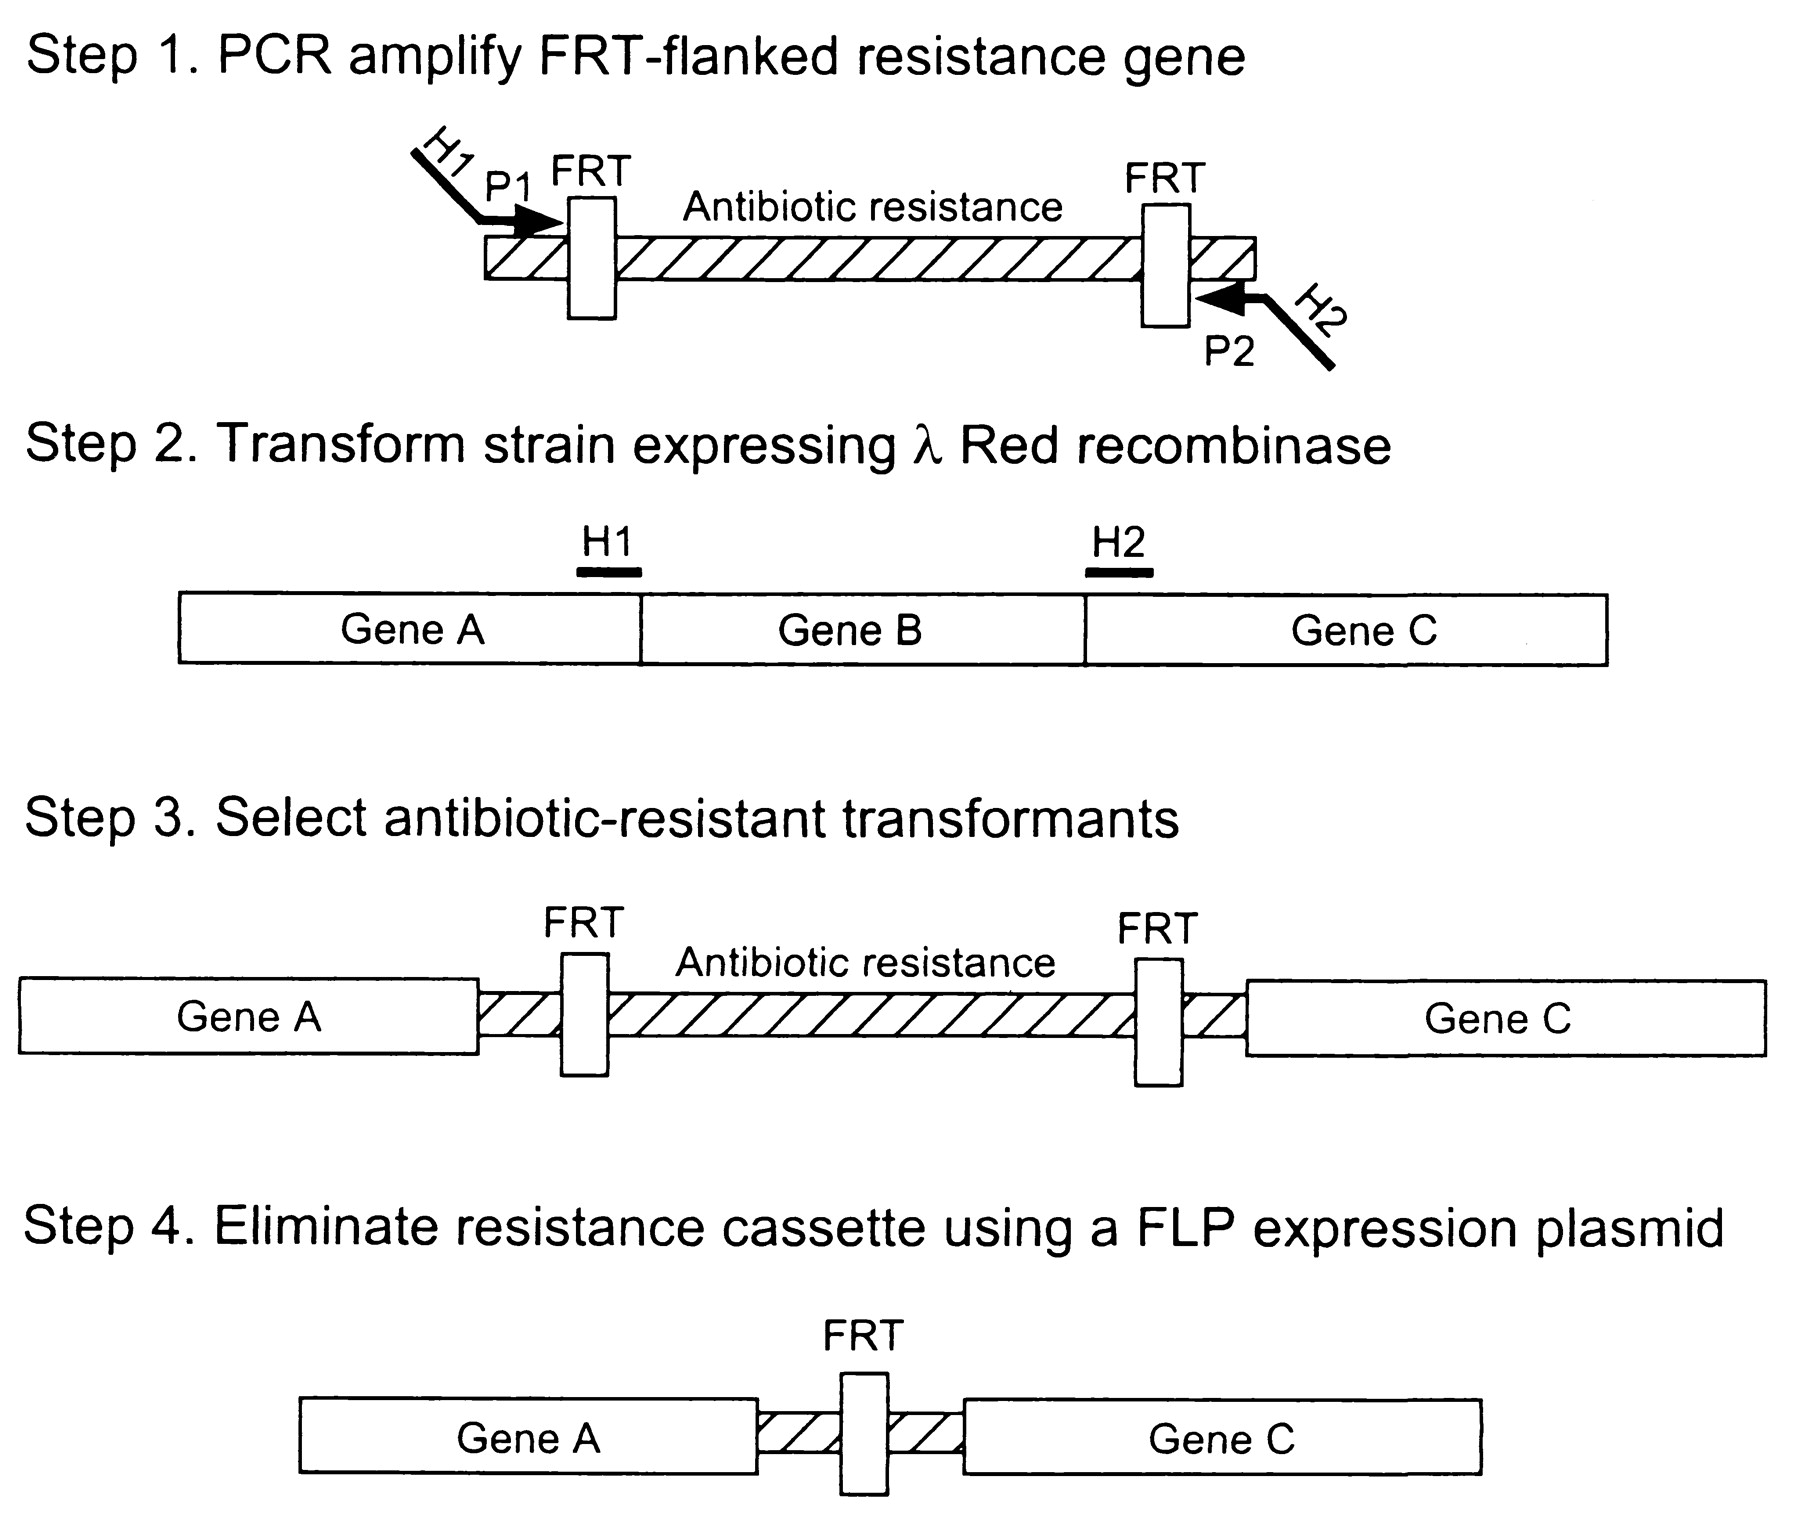
This method is based on homologous recombination using lambda red system. The knocked out gene is replaced with antibiotic resistance gene (kanamycin or chloramphenicol) that is generated by PCR by using primers with 50 nt hommolgy extension. This is accomplished by Red-mediated recombination in this flanking homologies. After selection, the resistance gene can be eliminated by using a helper plasmid expressing the FLP recombinase which acts on the directly repeated FRT sites flanking the resistance gene. The red and FLP helper plasmid can be simply cures by growth at 37°C because they are temperature sensitive replicons.
E.coli is not transformable with linear DNA because of the presence of intracellular exonucleases that degrade linear DNA (exonuclease V of the RecBCD recombination complex). The viral Lambda Red system includes 3 genes: gamma, beta and exo. Gam inhibits the RecBCD exonuclease V so that Bet and Exo can gain access to DNA ends to promote recombination.
Miniprep
We used the Wizard Plus SV Minipreps DNA Purification System (Promega) protocol
Production of cleared lysate
- pellet 1-10mL overnight culture for 5 minutes
- thoroughly resuspend pellet with 250µL Cell Resuspension Solution
- add 250µL Cell lysis solution to each sample: invert 4 times to mix
- add 10µL Alkaline protease solution to each sample: invert 4 times to mix. Incubate 5 minutes at room temperature
- add 350µL Neutralization Solution; invert 4 times to mix
- centrifuge at top speed for 10 minutes at room temperature
Binding of plasmid DNA
- insert Spin Column into collection tube
- decant cleared lysate into spin column
- centrifuge at top speed for one minute at room temperature. Discard flowthrough and reinsert column into collection tube.
Washing
- add 750µL Wash solution. Centrifuge at top speed for 1 minute. Discard flowthrough and reinsert column into collection tube
- repeat with 250µL wash solution
- centrifuge at top speed for 2 minutes at room temperature
Elution
- transfer spin column to a sterile 1.5mL microcentrifuge tube, beeing careful not to transfer any of the column wash solution with the spin column. If the spin column has column wash solution associated with it, centrifuge again for 1 minute at top speed, then transfer the speed column to a new, sterile microcentrifuge tube
- add 100µL of nuclease free water to the spin column. Centrifuge at top speed for 1 minute at room temperature.
- discard column and store DNA at -20°C or below.
Fluorescent single cells visualisation
Slide preparation
- Make LB-agarose : 0.15g of agarose in 10ml LB
- warm it up in the microwave (a lot!!, to avoid cristal of agarose that could remain in the gel => ugly over microscope)
- wash the slide (special slide with "two holes" with ethanol)
- put ~80µL of LB-agarose in each hole
- spread the gel with another slide and wait for ~2 min
- remove extra gel with a cutter
- put a droplet on the gel:
- if you have a solid culture:
- - pick up some colonies
- - suspend within 100µL liquid medium (M9)
- - put 1-2 µL on the gel
- if you have an avernight liquid culture:
- - take 1mL of the culture
- - centrifugate 1000 rpm 1 min
- - resuspend into 150 µL of medium (M9)
- - put 1-2 µL on the gel slide
- spread it by moving the slide
- wait until you don't see the droplet anymore (2min)
- put a coverslip and attach it with nailpolish
- optionally : you can put wax around
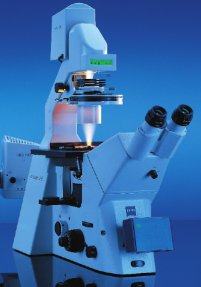
Turning on the microscope
- turn on : the light, the microscope, the shutter, the joystick
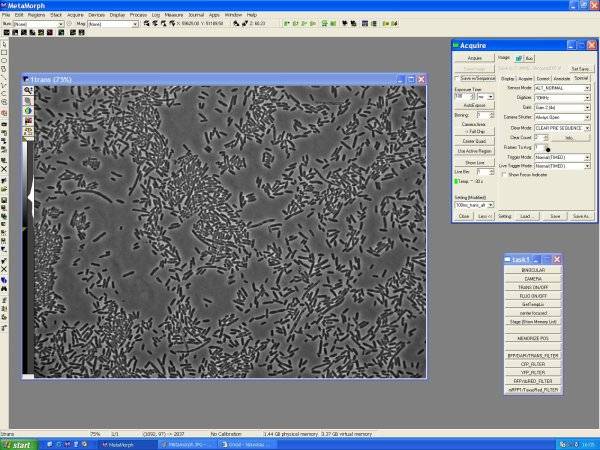
- launch Metamorph
- turn up the condenser and the objectives in load position
- !! take care : not keeping the light on if we doesn't use it
- !! do not switch on short after
- wait 5 min (the microscope is checking the ranges of movement
Visualisation
Preparation
- put a droplet of immersion oil on your slide, and attach it on the slide
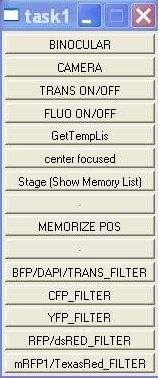
- Journal >> Show task bar
- Task bar
- >> Trans ON/OFF: turn on the halogen lamp
- >> Binocular/Camera: turn on the binocular or the camera
- >> Choose the fiter
- Move up the objective until oil touches the slides
- Turn on the binocular with trans filter
- Move up the stage with micrometric "screw" until you see your cells, or something moving
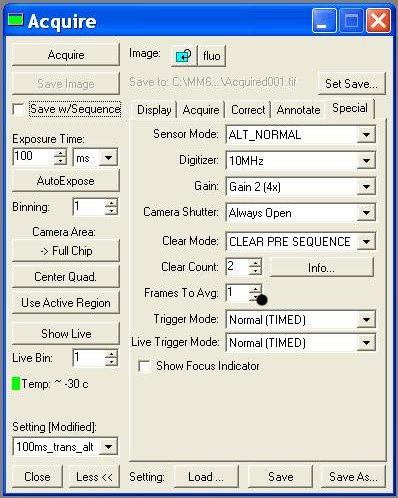
- Acquire:
- - Digitizer (10MHz!!)
- - Image >> New !!! ( without this, each image you take will overwrite)
- - Settings >> (trans ou fluo; choice of exposure time)
- Turn on the camera (Task bar >> Camera)
Trans Image
- Turn trans light on (Task bar >> Trans ON) and trans filter
- Acquire >> 100ms trans
- Acquire >> Show Live
- Acquire >> Acquire: acquire the trans image
Fluo image
- Task bar >> fluo filter; trans OFFOFF)
- Acquire >> 1s fluo
- Acquire >> Acquire: acquire the fluo image
- Acquire your images, etc, have fun
- save your images in E:\iGEM\YYYY-MM-DD\a_proper_name
Turning off the microscope
- Turn off the software, the microscope and the differents machines
NB : Nile Red, choose mRFP1/Texas Red filter
Digestion reactions
In order to perform digestion reactions, we use enzymes purchased from "New England Biolabs".
A classical digestion reaction is performed as follows:
Prepare a reation mix (50µL reaction volume):
- 1µg of template DNA
- 0.5µL BSA 100x (some enzymes require Bovine Serum Albumin in order to be functional)
- 5µL reaction buffer 10x (see below)
- 2-4µL of enzyme(s) (no more than 10% of total volume)
- H2O qsp 50µL
Enzymes function in different buffers. In order to perform double digestion reactions, buffer must be chosen with care, (EnzymX program provides information on buffer compatibility). The informadtion provided on NEB website is usefull:
More details on double digest buffers :
http://www.neb.com/nebecomm/tech_reference/restriction_enzymes/double_digests.asp
More details on double digest buffers including EcoR1:
http://www.neb.com/nebecomm/tech_reference/restriction_enzymes/buffer_activity_unique_re.asp
- 2.5 hours at 37°C to digest
- 20 mins at 80°C to heat inactivate enzyme
- 4°C forever
Preparation de gel d'agarose
agarose "entre 1 et 3%" 2 et 3% pour très petit fragment (petit = 200paires de bases) en routine 1.25 :
3g d'agarose+ 200 mL de TBE 0.5 x(trisborate EDTA)
-faire chauffer au micro-onde en surveillant parce que ca rentre en ebullition : arreter attendre et relancer -quand la poudre est fondue, sortir du micro onde, et rajouter 14µL de BET (manipuler avec precaution car toxique)
-couler encore chaud dans les moules: petits gels, et grand gels, petit puits(gels analytique) et grand puit pour des gels de purification( jusqu a 30 µL)
a conserver dans du TBE 0.5 x
